
I decided to do a quick how-to on my classic winged (or cat-eye) eyeliner in the morning.

The step by step + products used is after the jump!
All products used for the eyeliner:

Sephora Retractable Waterproof Eyeliner in Classic Black


Urban Decay Naked Basics Palette Eyeshadow Shade "Crave"

Eyeko Eye Do Liquid Eyeliner in Carbon Black

Stila Stay All Day Waterproof Liquid Eyeliner in Jet Black

Nars Smudge Proof Eyeshadow Base

Sephora Eyeshadow Brushes [click the pic ^ for the brush #'s!]
Tutorial
STEP 1:

PRIME your lid! I used to skip this step until I realized how important it it in keeping your makeup perfect for a full day/night out. Prime, prime, prime! I prime all over my top and bottom lids.
STEP 2:

Voila -- My eyeshadow is all complete! This is an eyeliner tutorial, not an eyeshadow tutorial, so bear with me! Just pretend! But for now, my eyeshadow is all done.
STEP 3:

Make a thick line with the Sephora Waterproof Eyeliner approximately where you want the eyeliner to be. This step doesn't need to be perfect, because it's going to be smudged and covered with shadow later. Just make sure you don't get the line TOO far up on the eyelid, or else it will cover up most of the lovely eyeshadow! Plus you'll risk looking like a raccoon.
[Tip: Because I have monolid eyelids, my eyeliner tends to be much thicker than an eyelid with a crease, so the thickness of my line may look extremely dramatic on others. If you have a creased eyelid, this line can be much thinner!]
STEP 4:

Fill in the line down to the lash line with the pencil, and smudge the crap out of it! I actually use the smudging end of the eyeliner when I'm in a hurry, but I normally use a Sephora smudging brush to do the job. Smudge until you can't smudge no more! Literally.
STEP 5:

Using a clean, medium sized eyeshadow brush, go over the smudged pencil line with a sweep of dark brown shadow. I use Urban Decay's "Crave," but any dark brown, matte shadow will work. I try to stay somewhat clean here, but my look tends to be a tad messy on purpose, so I don't worry about it too much.
STEP 6:

Using either liquid eyeliner pens, draw a thin, short line from the base of your eyelashes -- the goal is to angle it towards the tip of your eyebrow. This step can be very tricky if you don't have a ton of liquid eyeliner experience, but honestly: practice makes perfect. I swear!
[Tip: I recommend trying this step out a bunch of times while you're just lounging around your house/apartment before attempting to perfect it before you go out for the day/night. It can be pretty difficult to wash off if you make a mistake, and it's almost impossible to do this without ruining your eyeshadow as well. Practice this on a day when you have nothing else to do!]
STEP 7:

Connect the tip of the line to the top of your eyeliner in one short stroke, using the same liquid liner. Again, this step can be trickyyyy if you haven't practiced!
[Tip: That whole connect-the-dots theory works! If you're having trouble making these lines perfect with one stroke, make small dots where you want your line to be, and connect them together with the liquid liner!]
STEP 8:

Simply fill in the rest of the space between the lines with the liquid liner, and that's it!
FINISHED LINER:
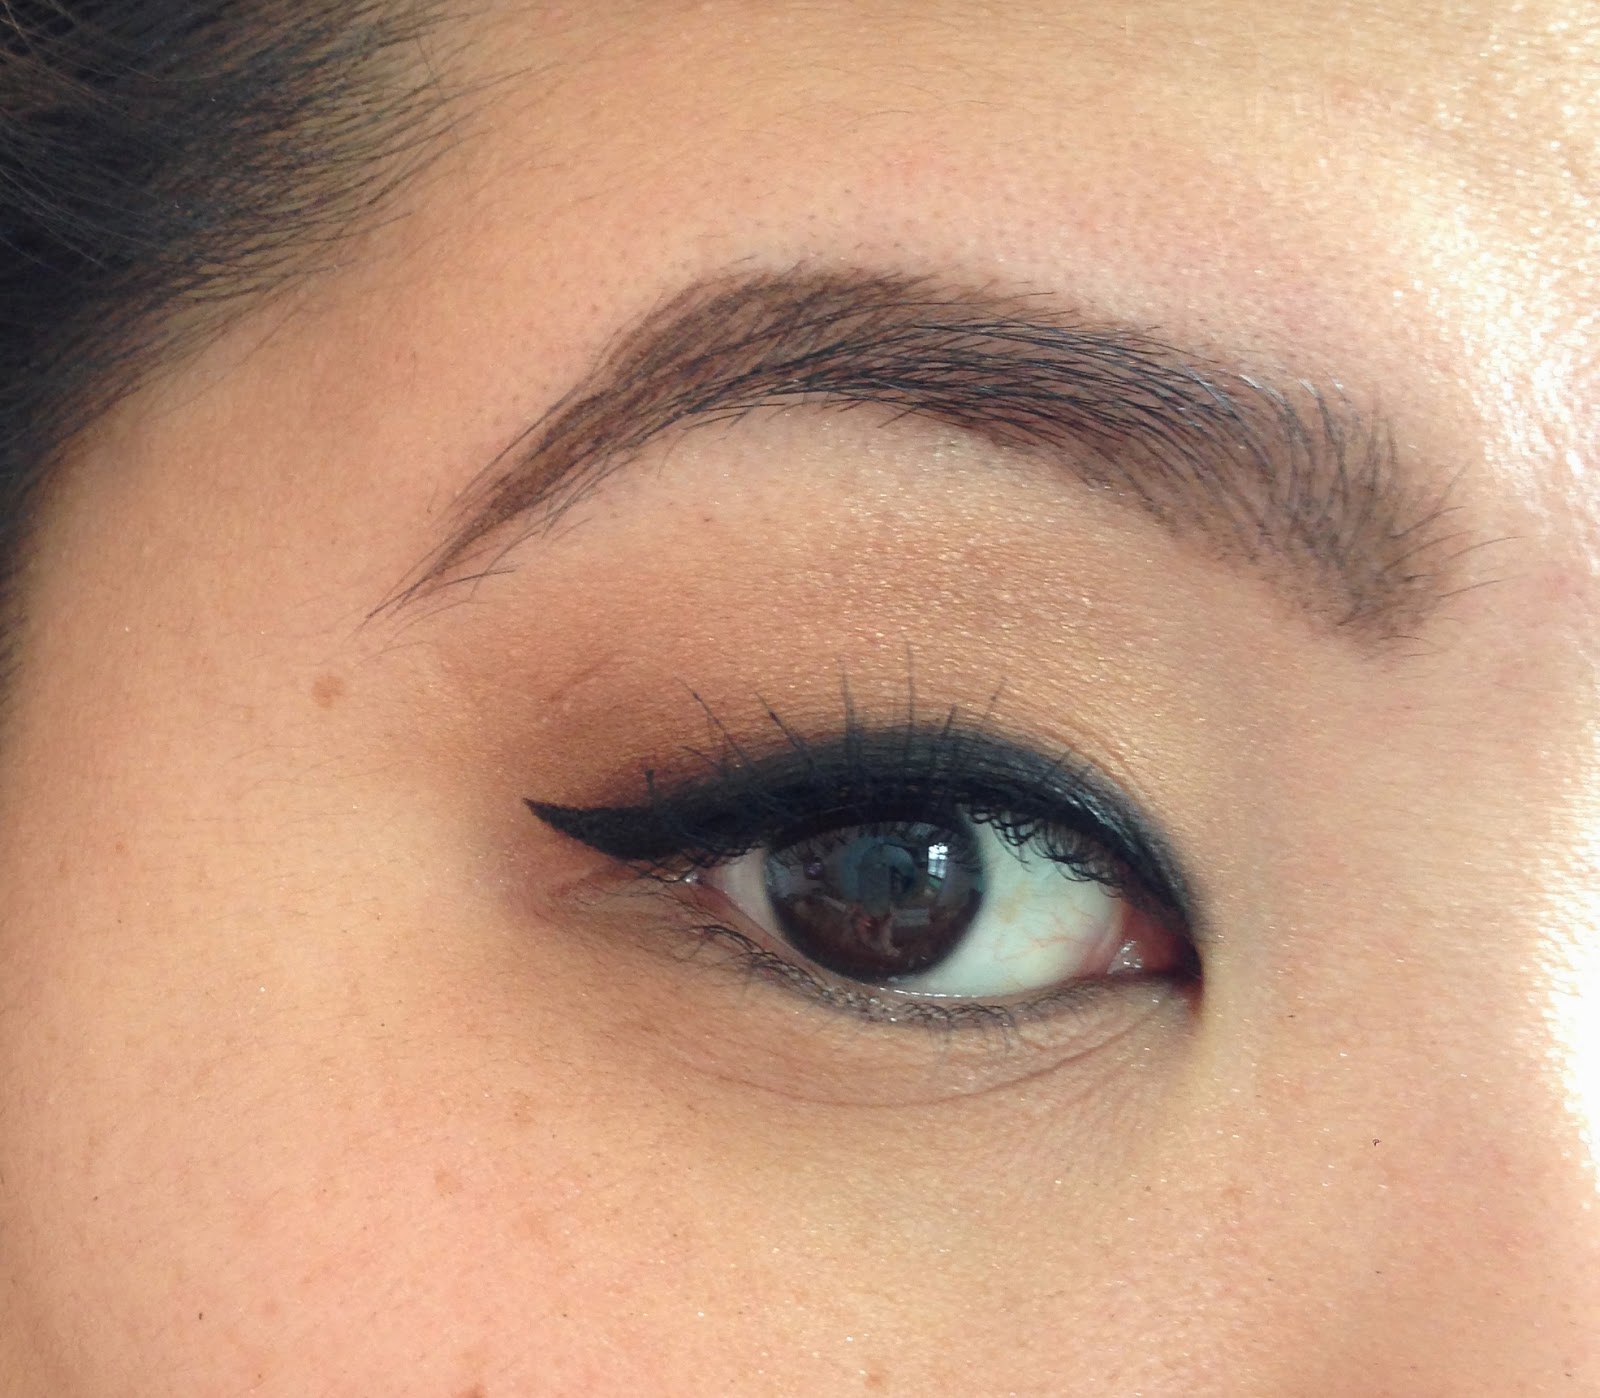
It really is simple once you get the hang of it. I know there are a lot of steps involved, but it's a really classic look that can be simple or dramatic -- just play around with the thickness of the liner, the length of the wing, and the eyeshadow base! HAVE FUN!
xojaybee
No comments:
Post a Comment