Friday, May 30, 2014

Kim Kardashian Inspired Makeup Tutorial!!

If you don't want to read this because it's inspired by Kim K, puh-lease.  Even if you hate her, it doesn't mean you have to hate her amazing makeup artist Mario Dedivanovic.  Her look for the wedding rehearsal dinner last week was phenomenal.  I saw it and I instantly fell in love.  Kim is known for her beautiful smokey cat eyes, and this was no exception.  However this look was different enough to stand out -- at least to me -- from her usual routine.  The cat eye was soft, and actually extended from the bottom lid, while the top lid was unusually bare [notice the top lid inner half -- barely any color!].


When I saw it I knew I had to recreate it for myself.  My interpretation isn't exact, but I didn't want it to be exact. I sort of molded the look to suit my eyes and my face.  I even included some highlighting -- how can you do a Kim K makeup tutorial without a good highlight?


Tutorial after the jump!

Wednesday, May 28, 2014

Topshop/H&M/Express Haul!

I've been doing a lot of summer and office-clothing shopping lately, and I decided to haul post some of my favorite pieces!!  These items are super random and don't really fit together so bear with me!

H&M

1.  Polka Dot Chambray Baseball Snapback ($10 IN STORE)


So I couldn't find this online on the H&M website, but it's definitely sold in stores -- at least in the Chicago stores.  I died when I saw this hat and just had to get it.  A snapback in denim fabric with white polka dots? I mean. Come on.  Wearing a hat like this instantly gives an outfit a relaxed, laid back vibe.  Even wearing it with a white sundress and some platforms will give you a cool, edgy look.  I like to wear my caps bill-to-the-side or with the snapback in the front (aka backwards).

2.  Woven Tank Top in Beige ($18)


I just really liked this top to wear as a layering piece for work underneath cardigans, blouses, and blazers.  I'm not particularly fond of wearing anything over button-up, collared shirts.. as weird as that is.  I think it gives the neckline a super stiff and stuff appearance.  So I use camis and tanks to wear as a base for a blouse, and leave the first few buttons loose.  It's work appropriate yet doesn't look like you're going to suffocate.

3.  Stripped Cotton "Corset" Tank ($10? I think? IN STORES)


This was a super random find at H&M and I love it.  I have a very similar crop top from MK&A's Olseyboye Collection, which I wear constantly, but this top is actually the length of a regular cami top.  It's really easy to tuck into high waisted jeans or cute skater skirt, for when I want the same type of look as a crop top but need and/or want to look more appropriate and less skin-baring.  

4.  Satin Tank Top in Natural White ($15)


Just another nice, flowy silky cami for the summer to wear in a professional setting!  I also like wearing tops like this in unexpected ways, like pairing it with destroyed denim cut-off shorts, converse sneakers or combat boots, and a snapback.  The silky fabric and girly cut of this tank, especially the extremely delicate single straps, really chic up a tomboy outfit.  

5.  Platform Sandalettes in Beige ($35)

Detail shot of the materials!

These shoes are everything!  I'm usually not a huge fan of platform shoes -- I'm a big single-sole girl myself -- but I saw these shoes and fell in love.  I don't own anything like them!  Those laces!!  Chunky heels are very on-point this season, and I thought the canvas material made these heels really wearable and super day-time appropriate.  But, since they're so versatile, they can also be worn with a little dress and work for a summer night out.  And even though these babies have a 4" heel, the platform is 1.5" so really you're only dealing with a 2.5" rise! Not bad, not bad.

Express

6. Black and White Portofino Shirt ($50 IN STORE)


These next two are a little boring, but also versatile!  I'm obviously a sucker for a button down shirt. And to be completely honest, I rarely buy women's button downs.  But I liked these so much I couldn't pass 'em up!  And Express usually has a deal where you buy one at full price and get a second for 50% off.  So that's what I did.  I like how unique this blouse is: completely white in the front, and completely black in the back.  It also has buttons on the sleeves with flaps, so you can roll them up and keep them in place (which I demonstrated in the photo on the left sleeve)!

7.  Plaid Convertible Sleeve Portofino Shirt ($60)


I've worn this blouse at least 3 times in the past two weeks. That's how much I love it.  It combines a lot of my favorite things: button down, plaid, and chiffon.  I normally don't wear anything blue, but I made an exception for this one.  I wear it to work with black pants and white cami, and I wear it out and about with jean shorts and a crop top.  So perfect.

Topshop

8.  Topman Plaid Flannel Shirt ($14 CLEARANCE)


This is 100% self explanatory.  It was on clearance for $14 and I, surprisingly, don't have a thick flannel in black and white buffalo plaid.  You know how I do.  No brainer! 

9. Topman Black Stripe Denim Long Sleeve Shirt ($55)


This is probably one of my most favorite items I've purchased all year!!  It seems so basic but it's amazing.  It's a distressed denim button down, sure, but those adorable "black" and "white" stripes!!  The actual fabric is thicker than my thickest flannel, and it's so warm yet still breathable.  I can say with confidence that I've never spent $55 on a button down in my entire life -- considering most of mine are $5 and under from Goodwill or Savers -- but this one was so worth it.

10.  Black Wrap Jersey Playsuit ($48)


I have a few rompers and playsuits like this, but I really loved the bodice of this one.  I don't have a playsuit with a surplice wrap front, and obviously I needed it. Obviously.  Just a sheer kimono, chambray button down, on its own with a sunhat, or even as a quick outfit over a bikini for a beach trip.. this romper will get a lot of use this summer.

11.  Horizontal Toe Post Sandals in Tan ($30)


I usually wear through a pair of flat leather sandals per summer, so this is my Summer '14 pair!  The straps are different enough to stand out yet classic enough to match with just about any summer outfit.  The tobacco colored leather is to die for, and the leather is so soft and flexible -- so no digging into the skin or causing blisters.  I also have flat feet, which basically means that a bone in both my feet is deformed, and I have no arches.  This flattens my feet out like a pancake when they're on the ground, which causes my feet to be extremely wide.  (You can see this in the first photo on my left side, where my foot is basically spilling over the edge of the sandal.)  So a lot of flat sandals can be very restricting and uncomfortable for me.  But I walked around in these ones and I have found a winner!

------------------------------------------------------

I know this was quite a random haul, but, as always, I just wanted to share a few purchases in hopes that I inspire or give new ideas to anyone reading!

xojaybee

Tuesday, May 27, 2014

NYX Pigments! $3!

I recently talked about the huge Ulta haul I ordered and said I was going to do a post about it.  I'm sorry it is taking so long!  But I loved (and have been using) these NYX pigments so much I thought they deserved a post of their own.

I love a good pigment.  They're long lasting (both on the eye, and the product in general), rich, opaque, and so beautiful on the lid.  I have some MAC and Lime Crime pigments, but haven't really branched out from there.  But lo and behold -- NYX pigments.  FOR ONLY $3 EACH.  Three. Dollars. Each.


Indeed.  The NYX Cosmetics Ultra Pearl Mania Loose Pearl Eye Shadows.  I, of course, bought four neutral/copper shades.  From left to right, "Mocha," "Oro," "Orange," and "Nude."  The only "downside" to this product, if you can even call it that, is the size.  MAC pigments come in a .15oz container, and the NYX pigments are only .06oz each.   But considering the price, at only $3 per .06oz, that's only $9 for .18oz.  And MAC charges $21 for .15oz!


The mouth or opening of the container is also quite small -- I had to dip a fine point eyeliner brush to get the pigment out.  You can also tap a little onto a flat surface and use a brush from there, but I find that this wastes quite a bit of product.


The pigment is so fine and delicate, and such a small amount goes such a long way.  The pigment itself is very similar to the MAC version -- maybe slightly more powdery and less.. chunky..? Less dense? I don't even know how to describe the MAC pigments, but that's the best I can do. Haha.

In shaded natural sunlight
In direct natural sunlight

Now, how gorgeous are these?  UGH.  "Mocha" is a beautiful true taupe color, "Oro" is a cooler-toned gold color, "Orange" is a true orange, and "Nude" is a pearly ecru color.  The great thing about pigments is the blendability.  You can blend them together on the eye for a gorgeous ombre look on your lid, and you can also mix them up before application to create new and unique shades.

And seriously -- for $3 a pop, this is such a good deal that you cannot pass up.  Ulta's website has 20 different shades, in almost every color you could want.  Do yourself a favor and buy some! $3!

xojaybee

Friday, May 23, 2014

LAVISH PALETTE!!

JUST A QUICK HEADS UP GUYS, THE ANASTASIA BEVERLY HILLS LAVISH PALETTE IS BACK IN STOCK FOR $24 GO GRAB ONE ASAP WHILE THEY'RE STILL AVAILABLE!!

I use this palette almost every day, it's so worth it!

DIY: Glitter Artwork!

Let's be honest, a lot of people are impressed by artwork hanging on walls in homes/apartments.  I mean, who actually has time to go out and buy art, frame it, and then do some interior decorating to make sure it's placed just right?

Wrong!  YOU can be this impressive, artsy person!  Tell me how cute slash impressive these look?!  They are so easy easy -- only about 20 minutes start to finish -- and free.  That's right.  Free!  (As long as you have the materials already.  But even if you don't, they're relatively inexpensive.  Much less expensive than buying a pre-created piece of art!)


For the record, I LOVE THIS STUFF.  I could interior decorate forever.  This is basically the only picture of my room that I have, and it was taken before it was completed -- my fairy lights weren't finished, and I didn't even have a mattress! Haha.  But you get the idea!

I'll do a DIY for my fairy lights soon!! :]


Anyway, this DIY artwork is so easy, I'm telling you!  And it looks pretty impressive when it is framed and hung on your wall.  Let's get started!

----------------------------------------------------------------------

All you need is:
A computer
A printer + paper
1 piece of thick white cardstock/cardboard/art paper
Glittery nail polish (any color to match the colors in your room!)
Scissors
Painter's tape (or any removable, lightly sticky tape)
Medium sized picture frame

How-To:

Open up a word processing program on your computer, and create any text you want to turn into your artwork.  I chose to use an ampersand for this tutorial, but as you can see I also did my initials, "j" and "k." You can also choose any font that you want!  


Print out the characters of your choice.  Make sure the size of the print-out is large or small enough to fit in the frame you are going to use!  My ampersand ended up being 775 point font in Times New Roman.


What you're going to need to do is carefully cut out the actual character, leaving a stencil of the outline of the character.  So try to make the lines as neat and straight as possible, with as few jagged edges as possible!


If there are any extra pieces on the inside of the characters that need to be cut out, do this super carefully as well!  You need to keep the white parts completely in tact so you can tape these down with the stencil.


Lay the stencil pieces on the thick piece of paper or cardboard and adjust it until you're happy with the placement.


Tape the pieces down using painter's tape, or a kind of tape that isn't super sticky and won't harm the cardstock that your art is going on.


Using glittery nail polish, start painting the inside of the stencil!  Be really careful around the edges, because you don't want too much of the color bleeding out underneath the stencil.  It's not meant to be perfect though, so don't worry if it doesn't look completely neat!  The homemade quality is what makes it unique.


I used a really cheap polish for this so I wasn't using a ton of a nice, expensive polish.  The "Studio M" brand is from the grocery store Meijer (which is all over the midwest) and was only about $2 or so.  The point of using this polish is that it's free, and can usually be found lying around you room somewhere.  Don't go out and buy something super expensive just for this!  If you can find an acrylic glitter paint cheaper than $2, use that instead!  Anything glittery that dries completely dry will work!


Once the polish has dried completely, slowly and carefully peel off the outside stencil..


Then peel off the inside stencils.  If the polish sort of stuck the stencil down to the paper and you have a hard time finding a place to grab, use a pair of tweezers to peel the smaller portions off.  And really make sure the polish is dry when you do this, or else it'll end up smudging and bleeding.

How adorable is this?!


Cut the cardboard to the size of your frame, and place the glittery artwork wherever you feel looks the best within the frame.

And you're done!


I really love the way these turn out!!  They take classic fonts and characters and add a little oomph with the glitter.  Adorable!  They look good on a wall, on a desk, on a nightstand.. wherever you want!  And since you're the one making them, you can add personal touches and every piece is unique.  They also make amazing gifts!  They're super impressive and can make any space a little cuter :]

xojaybee


DIY: "Cold Shoulder" T-Shirt!

This is THE EASIEST DIY ever!  It barely requires any modification at all, but looks so cute when it's finished.

I love the look of cold (or open) shoulder shirts.  [I also created a version of this shirt from a flannel button down, but didn't photograph any steps of it.. fail.]  It's not a tank top, but it's not a true t-shirt either.  It's perfect for 70-80 degree days when you want a little more coverage but don't want to be sweaty all day!


All you need are three things: Any t-shirt (a little oversized is the best!), a pair of scissors, and a piece of chalk!

Start with the t-shirt turned inside out.  You can honestly use any type of t-shirt for this!  I just used a completely plain heather grey one for mine.


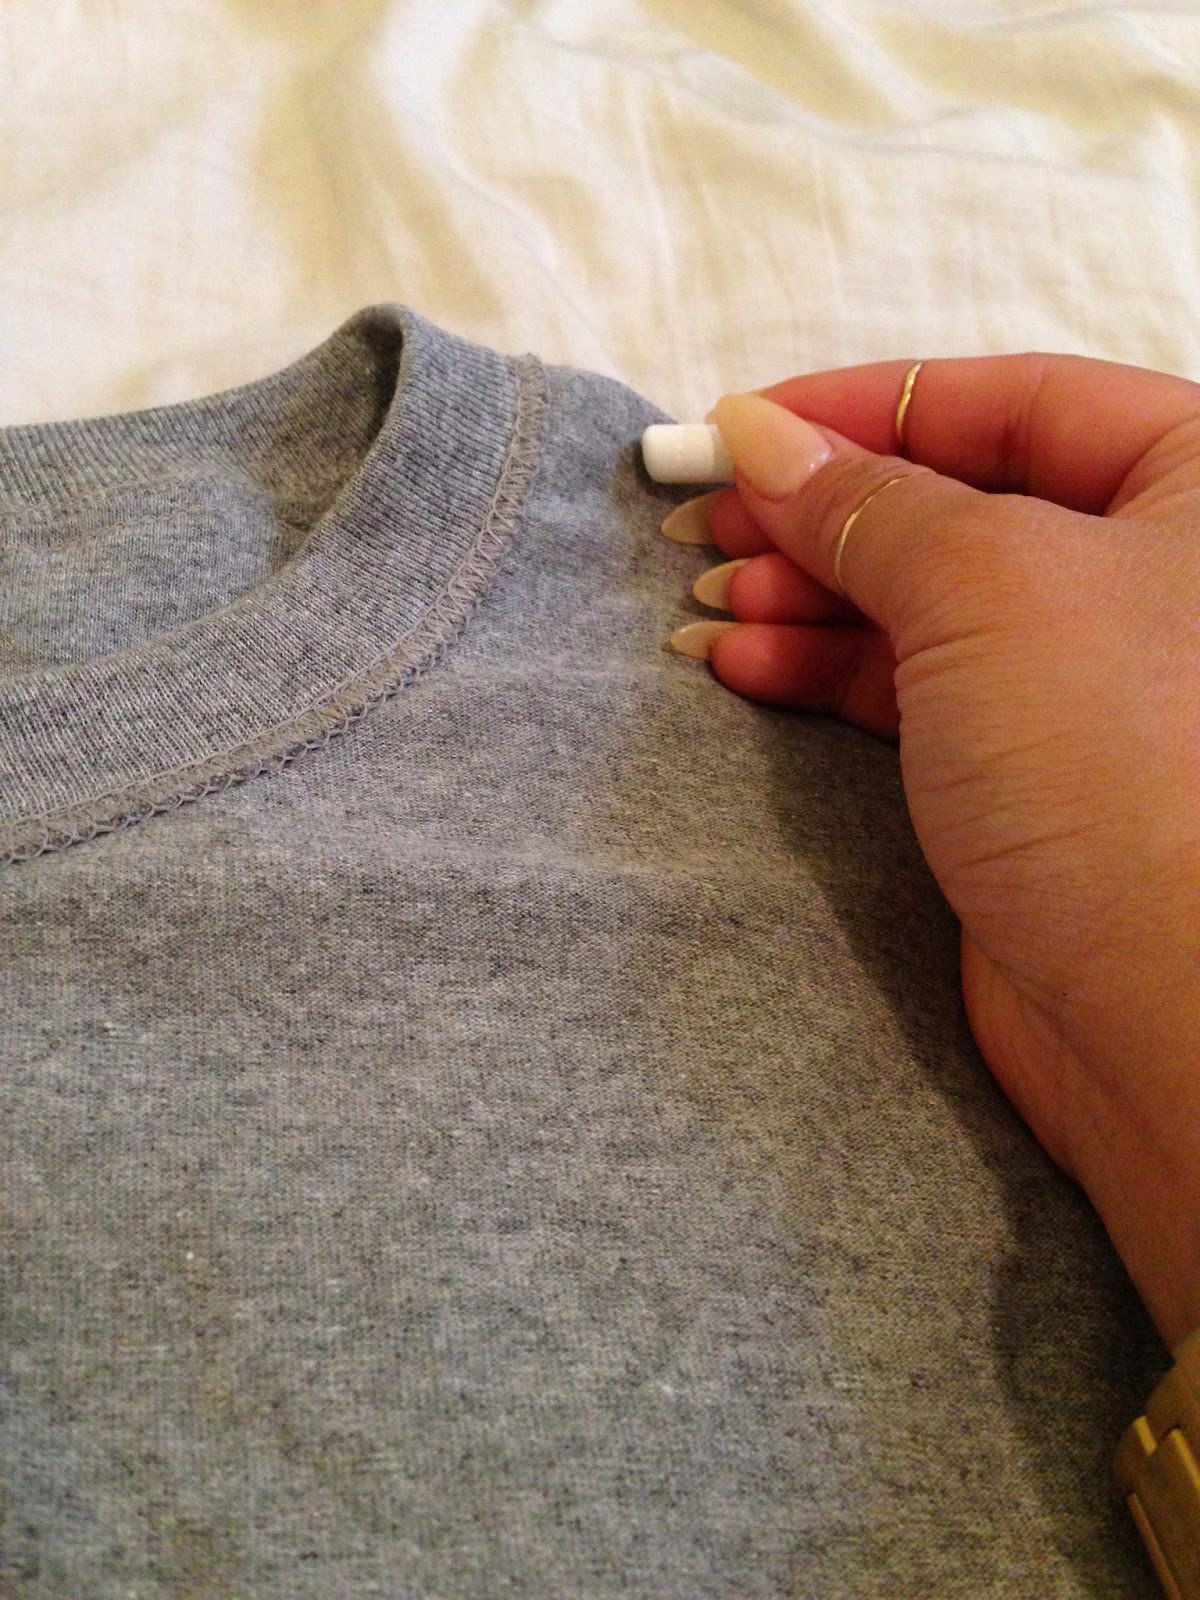
With the chalk, make a line about 1.5 inches down from the crew neck.  This step is optional -- you can totally keep the neckline the way it is, but I think the shirt looks a lot more "finished" when you also modify the neck!


Mark a little half-circle shape right on the shoulder of the t-shirt.  Leave about 2 inches between the chalk line by the neck and where you start the shoulder line.  [This is why we marked the neckline first, even though we haven't cut it yet!]  Depending on how big or small the shirt is, and how wide your shoulders are, make sure to place the future cut-out right where the end of your shoulder dips down and becomes the top of your arm.


Cut alone the shoulder line you just created.  Make sure you keep the little half-circle piece of fabric in tact when cutting it out!


Using the little half-circle piece of fabric, use this as a stencil for the other shoulder.  You want to make sure the holes are even, so this is a pretty important step!  Line up the seams of the shirt and the cut-out stencil.


Draw a chalk line around the fabric.


Cut along the shoulder line -- but since this time the line is an outline, cut inside the line, not outside of it.  [AKA, after you're done cutting, the chalk line should still be left on the shirt.]


Now cut a little snip right at the top seam of the shirt in the neck hole, until you reach the neckline chalk line.


Cut along the neckline chalk line.  Cut only through the TOP layer of the shirt!  Make sure the back of the shirt is left uncut for now.


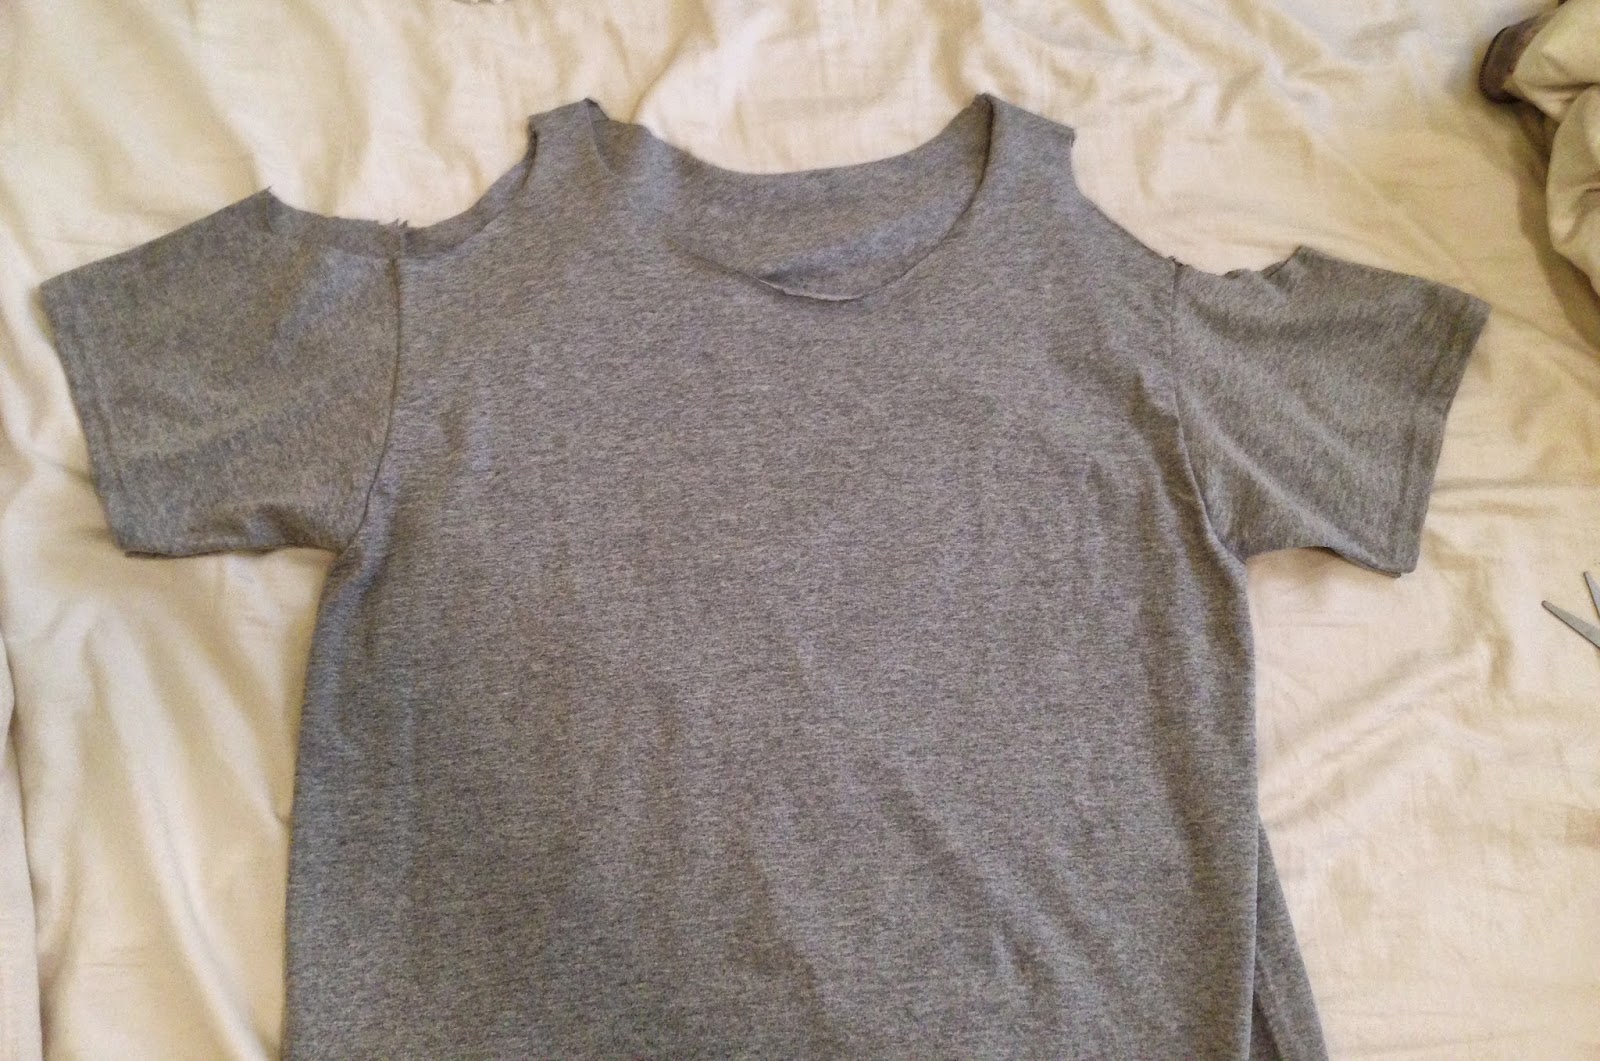
Now cut the back layer of the shirt, right up against the actual collar of the shirt.


Flip the shirt right-side out, and that's it!!


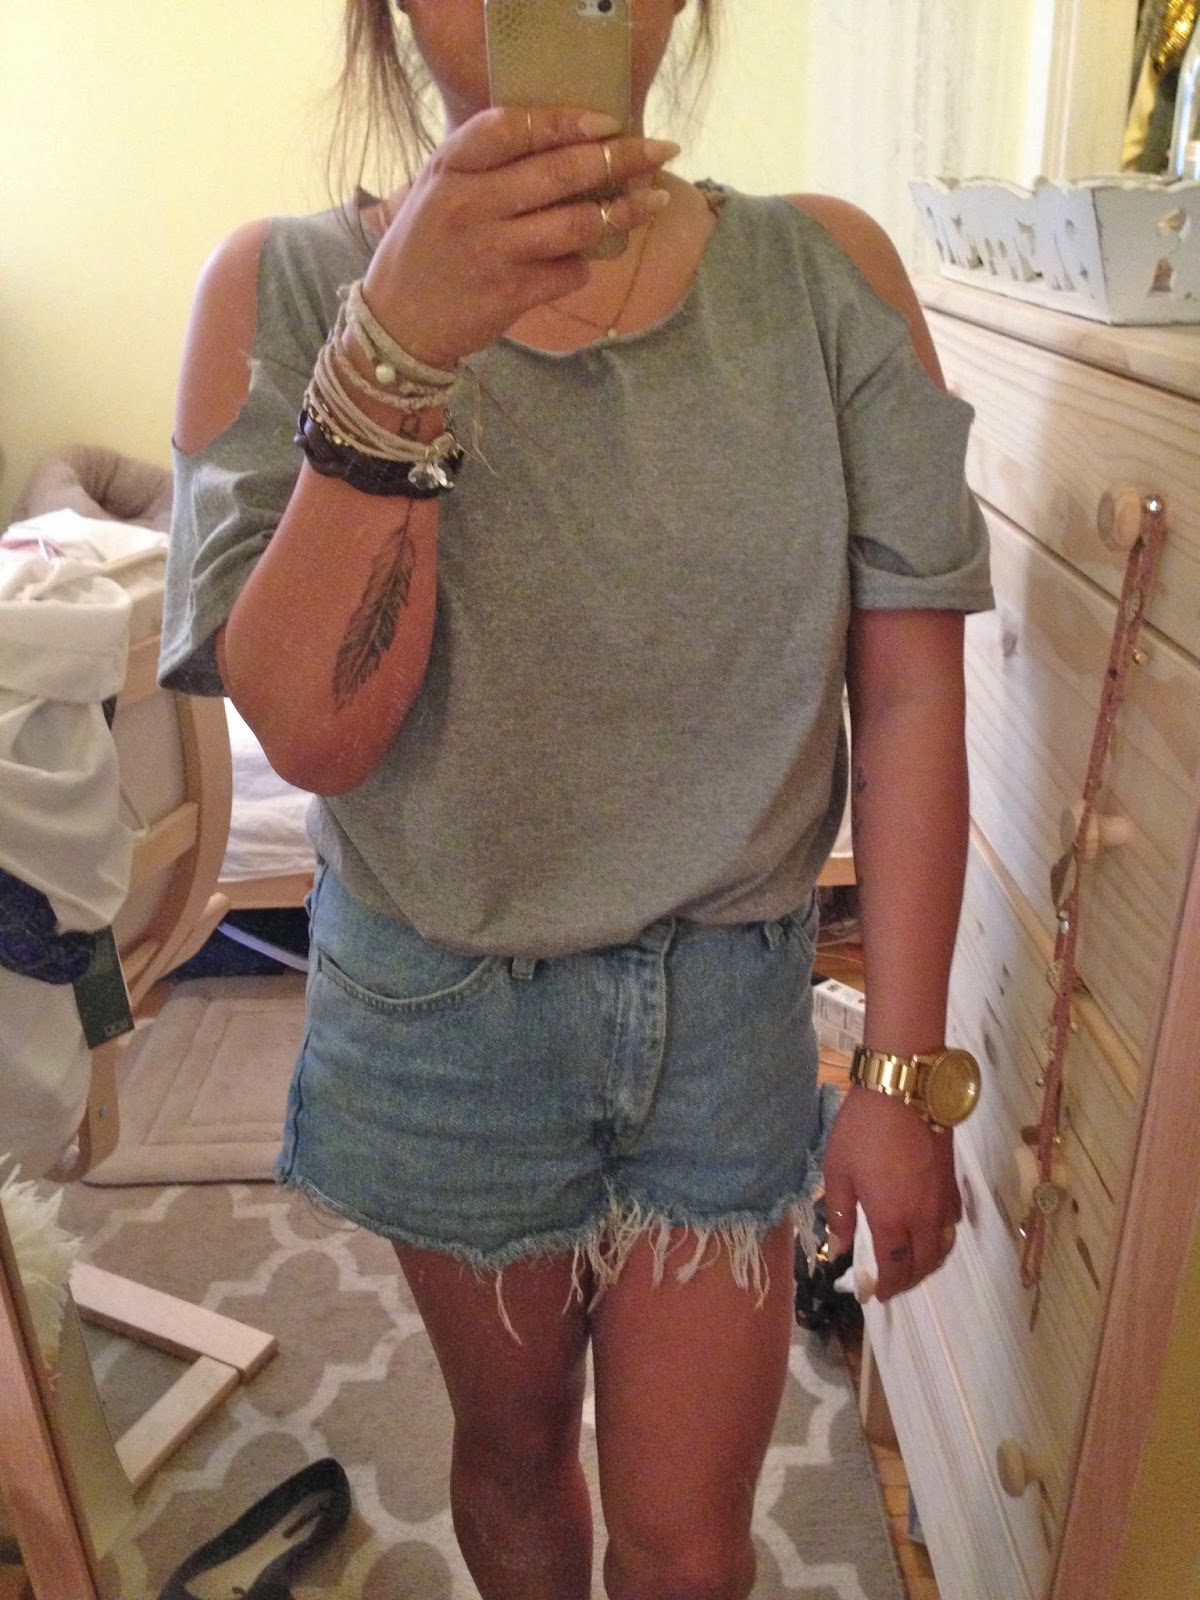
I love this shirt!  It takes a regular jeans-and-a-t-shirt summer outfit and adds a little twist, while still remaining casual and classic. It looks cute with a pair of cut-offs, tucked into a maxi skirt, or with a pair of distressed boyfriend jeans for chillier days/nights!


This is one of the easiest t-shirt DIY's that I do, so grab a pair of scissors, find a boring shirt, and try it out!

xojaybee