Sunday, December 28, 2014

Quick Tips/Tricks #3: Nighttime Moisturizing! (4 Easy Tips!)

Sleep.  Who needs it, right?  I know I could get so much more out of my 24 hour day if it wasn't for that stupid necessity.  But.. since we're forced to give up hours of our time to devote to sleep, we might as well make the most of it and take advantage of it.

Even though we're not awake and active during those 6-8 hours (or whatever amount of sleep you get), we can still take steps to improve our health and beauty.  Below are a few of the things I -- and you can -- do during shut-eye:

1.  Hair


Infuse your hair with healthy oils!  I love taking my 100% pure argan oil and massaging it into the ends of my hair for an overnight treatment.  Because my hair can look a mess at night, I go crazy and basically soak it into my hair ('til it looks almost damp).  After your hair is saturated, twist it up into a ballerina bun and secure it with a scrunchie (I think a hair elastic is a little too harsh for this).

BUT be sure you use an old pillow case during nights you do an oil treatment, or else you may ruin your pillow and/or actual pillow case!  If you don't have any spares, a great alternative is to wrap your pillow with the pillowcase in an old t-shirt you aren't planning on wearing.  This soaks up any oil that comes off your hair and protects the pillow underneath.

2.  Lips


I do this virtually every night during the winter, because my lips get so dry and chapped.  All you do is slather on a ton of moisturizing lip balm right before bed.   That's it!  Because you have 6-8 hours of virtually uninterrupted inactivity, it's the perfect time to soak some moisture into your lips.  A thick layer of balm will keep your lips coated throughout the night, and will act as a barrier between your chapped skin and drying saliva in case you tend to lick or bite your lips in your sleep.

3.  Feet


Ugh.  I literally shudder when I think of how dry feet can get in the winter.  Hours of walking in socks and boots can really do a number on your feet.  To help combat the cracking and peeling and callousing, all you need to do is cover your feet in lotion and put a pair of socks on, then catch some zzz's as normal.  Keeping your feet moisturized for so many hours will help soften any dry skin, and make it super easy to exfoliate the next day in the shower.  Keep up the smooth skin by lotioning-and-socking every (or every other) night!  I've been loving Philosophy Beauty Fresh Cream lotion lately -- it smells like fresh whipped cream and I'm obsessed.

4.  Face


If keeping your lips moisturized is so easy, moisturizing your face is just as simple.  Even though I have super oily skin (especially in my T-zone), my cheeks still get flaky and parched when the air is cold and dry.  To combat this, leave a skin serum on any dry skin overnight and let the vitamins and moisture soak in during the night.  I really love the Vitamin E line at The Body Shop, and the Moisture Serum is no exception.  After you wash your face before bed, swipe on any sort of face cream or serum, massage it in, and go to sleep!  In the morning, follow your same routine, and notice how much smoother your face will feel.


Using these quick tips and tricks will leave you moisturized and help make sleep feel much less.. boring and wasteful :P

------------------------------------------------


Saturday, December 27, 2014

Ballerina Nails > Stiletto Nails??

I did it.  I finally did it.  I have a new nail shape.  I've had stiletto nails since the fall of 2012, and I thought now is the time to do something different for a change.  Don't get me wrong -- I loved my pointy talons.  And it's not like these babies aren't still claws.   


They're called "ballerina" or "coffin" nails, due to their shape.  The tip of the nail resembles either a coffin (eek), or, as I prefer to refer to them as, the pointe of a pointe ballet shoe.  Love.

I frequently get asked what one should ask for when they walk into a nail salon.  I always get a full gel set (or fill), and ask if the nail tech wants to see a picture of what I want.  The answer is usually "yes" -- and if it's "no," I'd honestly look elsewhere.  Pull up a photo of the nail shape you want -- in my case it was a ballerina nail.  It's pretty easy.  Just use Google!  And DON'T be afraid to stop the nail tech if you notice he or she is not doing what you want.  I know it may seem rude or intimidating, but they're your nails, and you should be happy with the final result!

Be daring with your nails (if your school/work allows) and try something new, trendy, or just something you've always wanted to try.  They're just nails, and can be changed within minutes!


Wednesday, December 24, 2014

Quick GRWM (Get Ready With Me)! Full Face Makeup + Outfit!

If you watch YouTube beauty and fashion gurus at all, you know how popular the "get ready with me" videos have become.  It's more detailed than a run-down of products used, but not as thorough as a step by step tutorial.  It's sort of the perfect happy medium of the two -- and I wanted to figure out a way to photograph, instead of film, a GRWM for my blog.

I figured the easiest way to do this was to take a photo of the basic steps I do while I'm getting ready, but not for every single small step as I would in a tutorial.  And instead of writing out each direction, if you will, I would just list the products I used in the step photographed above it.  

If this is too confusing or not helpful, let me know!  But I thought it was a good way to let you all know what products I use for what steps, without a full blown, lengthy, and time consuming step-by-step.  As always, the link to every product I used is listed in the description.

The first portion is my basic makeup, and the second is an outfit I wore that day (if it's different than what is pictured in the makeup section, it's because I changed my mind and wore something different for the rest of the day)!


Enjoy!

(After the jump!!)

Wednesday, December 17, 2014

ColourPop Cosmetics Lippie Stix + Lippie Pencil Review!

I always love finding out about a good indie brand of makeup.. especially when they're inexpensive but great quality.  A lot of people tend to stick with tried and true brands of cosmetics -- drugstore brands like Cover Girl or Maybelline, high-end brands like Dior and Estee Lauder.  But it's really fun to branch out and see what else is out there in the makeup world -- and trust me, there is a LOT.

I kept hearing about the new ColourPop line, made in L.A. and sold at ridiculously reasonable prices.  Their products are only $5 a piece!  Their stuff has been all over YouTube and beauty blogs lately, with a bunch of gurus raving about how great everything is.  Because I love my nude lips, I decided to go ahead and pick up one of their Lippie Stix (their lipsticks) and a Lippie Pencil (a lipliner).


The prettiest colors on their site, in my opinion obviously, were "Frida" and "Brink."  Clearly.  I just tend to gravitate towards nude shades.  I think they're the most wearable and definitely the easiest colors to pull off for day time and everyday wear.  I also judge a new brand based on products I know the best (hence why I tend to purchase neutral shadows as well).  If I have something to compare and contrast it with, I'll be able to better evaluate its quality and performance!

I went with "Frida" for a lip liner, called a Lippie Pencil, and "Brink" for the lip stick, called a Lippie Stix.


The Lippe Pencil is a traditional lip liner, with a basic sharpen-to-use format.  The Lippie Stix is what I find the most fascinating -- it has a thin twist-up applicator, much narrower than any other lipstick I have used.  (The closet thing I can think of is the Clinique Black Honey lipstick, but even that is a bit wider).  It almost reminds me of a twist-up Crayon or a highlighter-type container.  But I like it!  I don't know why, but something about it just screams, "I'm cute and easy to use."  (Please.. don't do a "that's what she said" joke.)  


I'm in love with the colors!  And the formulas are amazing for their $5 price tag.  I was afraid they would be too sheer or not very pigmented, or too drying, or something.  But no!  They're surprisingly awesome.  With just one swipe of each product, I get a TON of coverage. The consistency is super creamy and feels smooth on the skin, with zero tugging or pulling.  The lip liner dries to a completely matte finish, and the lip stick is a semi-matte (leaning more towards matte).  "Frida" is definitely lighter in color than "Brink," but not by much.  They're in the same color family, but "Brink" has a slightly darker, mauve-y tint to it.  The ColourPop website describes it as the perfect "Kylie" inspired lip.  I sort of have to agree!  

I decided to layer "Brink" on top of "Frida" to see how they'd wear together (since that would probably be how I wear them IRL).  


I absolutely love the color.  It's a gorgeous dusty nude shade in person -- it sort of comes across a bit more rose-colored in the photographs than I would have hoped, but you can get a good idea of what they look like on the lip.  The only downside I see to this product is the way it sort of sinks into every fine line of your lips.  I have pretty dry lips at the moment, mostly due to the weather and stress (thanks, final exams!), and because the formula of both the lip liner and lip stick is so dense, creamy, and pigmented, it tends to settle into every nook and cranny.  But as long as you make sure you moisturize before you wear this, it's an AMAZING product!  [Go check out my DIY lip scrub and mask to cure those winter lips!]

I'll definitely be buying some more cosmetics from this line -- next on my list is a deep berry Lippie Stix called "Creature" and some $5 eye shadows!

For only $5 a piece, ColourPop sells great products, and they're definitely worth the investment.  Go pick up some staple pieces like I did, or experiment with fun shades you normally wouldn't buy at a higher price!

----------------------------------------------


Tuesday, December 16, 2014

W7 Palettes! "In The Buff" Naked 2 Dupe, and "In The Nude" Naked 3 Dupe!!

Don't get me wrong -- I am a sucker for a fancy makeup product.  It's not a great thing, per se, but I don't mind spending top dollar for something that's worth it.  However, when I find an amazing dupe, it almost makes me even happier than when I find the original product it's knocking off!

Queue: The W7 Natural Nudes Eye Colour Palettes.  I am obsessed.  W7 Make Up is a branch of Warpaint Cosmetics from the UK, and I hadn't heard of it until recently.  I picked up two of their palettes (via Amazon) called "In The Buff" (a dupe for Naked 2) and "In The Nude" (a dupe for Naked 3).  Because I already own the original Urban Decay Naked Palette, I didn't end up buying "Lightly Toasted," which is W7's dupe for the original Naked.


Guys -- they're only $7.50 each.  You can get "In The Buff" here and "In The Nude" here.  I figured, even if they were shitty quality, they were only $8 each, so paying $16 for a mistake isn't the worst that could happen.  They do ship from the UK, so definitely look at sellers who offer free shipping (or else it can be upwards of $10 just to get them to your doorstep).  

For upfront comparison between some similar Urban Decay shades and some W7 shades:

Top Row: Urban Decay; Bottom Row: W7

Just as a disclaimer: I used Smashbox 24 Hour Photo Finish Shadow Primer (a current obsession) for my base, and used a crease brush for shadow application.  I decided to go against finger swatches, as the pressure of the swatch and density of the shadow used to apply with a finger is not very accurate and applicable to that of a brush application.  [Also, apologies about my tattoo getting in the way! I couldn't fit them all onto my hand, so I had to use my forearm.]

Without further ado, here is my review:
(As always, click the photo for a larger view!)

In The Buff


At first glance, the packaging is an obvious dupe for the Naked palettes.  Yes, of course they're going to be cheaper and less quality than Urban Decay -- you ARE only paying $8, after all.  The tin is pretty cheap feeling in the hands, and as soon as you open it, you can tell that the plastic container the pots are sitting in is also pretty bad quality.  The brush that comes with the palette is also horrendous (one side even has a sponge tip applicator!), and there is no mirror inside.. but never mind that.  It's the shadows that count, right?  

And they're beautiful!  Just looking at them, you can tell how closely they match the Urban Decay shadows.  When swatching them, I did notice that they are a SLIGHTLY more powdery and less buttery/velvety than the UD counterparts, especially over un-primed skin.  (I, however, aaalways recommend using an eyeshadow primer before applying any type of eye makeup.)  This is also not noticeable when finger swatching -- in fact, there were a few W7 shadows that felt even MORE creamy than their Urban Decay dupes (shocking but true, I swear).  But since I won't be applying these shadows to my lids with my fingers 98% of the time, the brush application is what is more applicable in this review.

Top row over primer, bottom row on clean bare skin

The color payoff in the lighter shades isn't nearly as quality as in the darker ones, and the matte shades are a little chalky.  For example, can you even make out where I applied the color "Buff" in those swatches?  Barely.  And "Sand" is a little hard to see unless you're under a light, when the shimmer really comes through.

But shades like "Thunder" and "Topaz"?  TO DIE FOR.  And I'm also a huge fan of "Camel" because of it's warm, rich undertones.  The shimmer shades are super pigmented and apply smoothly to the skin, with very minimal fall out.  To be completely honest, I think this palette is worth much more than $8 -- I can see people paying at least $20 and being satisfied with the product!  Considering the Naked palettes run for $54...

In The Nude


The packaging is the same type as the In The Buff palette, with the same cheaper feel, terrible brush, plastic interior, and no mirror.  But again.. it's the shadow quality that truly counts.  The feel of these shadows is identical to the shadows from the In The Nude palette, but just less pigmented -- however the UD Naked 3 palette is the same way, and would read pretty similar on my skin tone as this.  Some of the colors sort of blend and melt into my skin, but that is to be expected of more flesh-colored shadows (as many of these are)!

Top row over primer, bottom row on clean bare skin

I found myself a bit less satisfied with the color payoff from the In The Nude palette.  I found this palette to be of somewhat lesser quality than the In The Buff palette, but not by much.  I think this is also due to the fact that my skin is pretty tanned most of the time (and I'm even super pale for my standards in these photos), so a lot of the lighter shades just don't read very well on me. The color payoff from the shimmer shadows and the darker shades were, again, was much better and much more pigmented than the lighter ones.  Even for being such light shades, they are still extremely beautiful on the skin, and are absolutely gorgeous when the light hits them -- super shimmery, shiny, and sparkly!  This palette has even inspired me to do a pink-y eye look in the near future.  Yes, you heard me.. pink.


It's amazing because for $8, you can hardly get some drugstore single pot eyeshadows, and you're getting a full 12-pot palette from W7!  

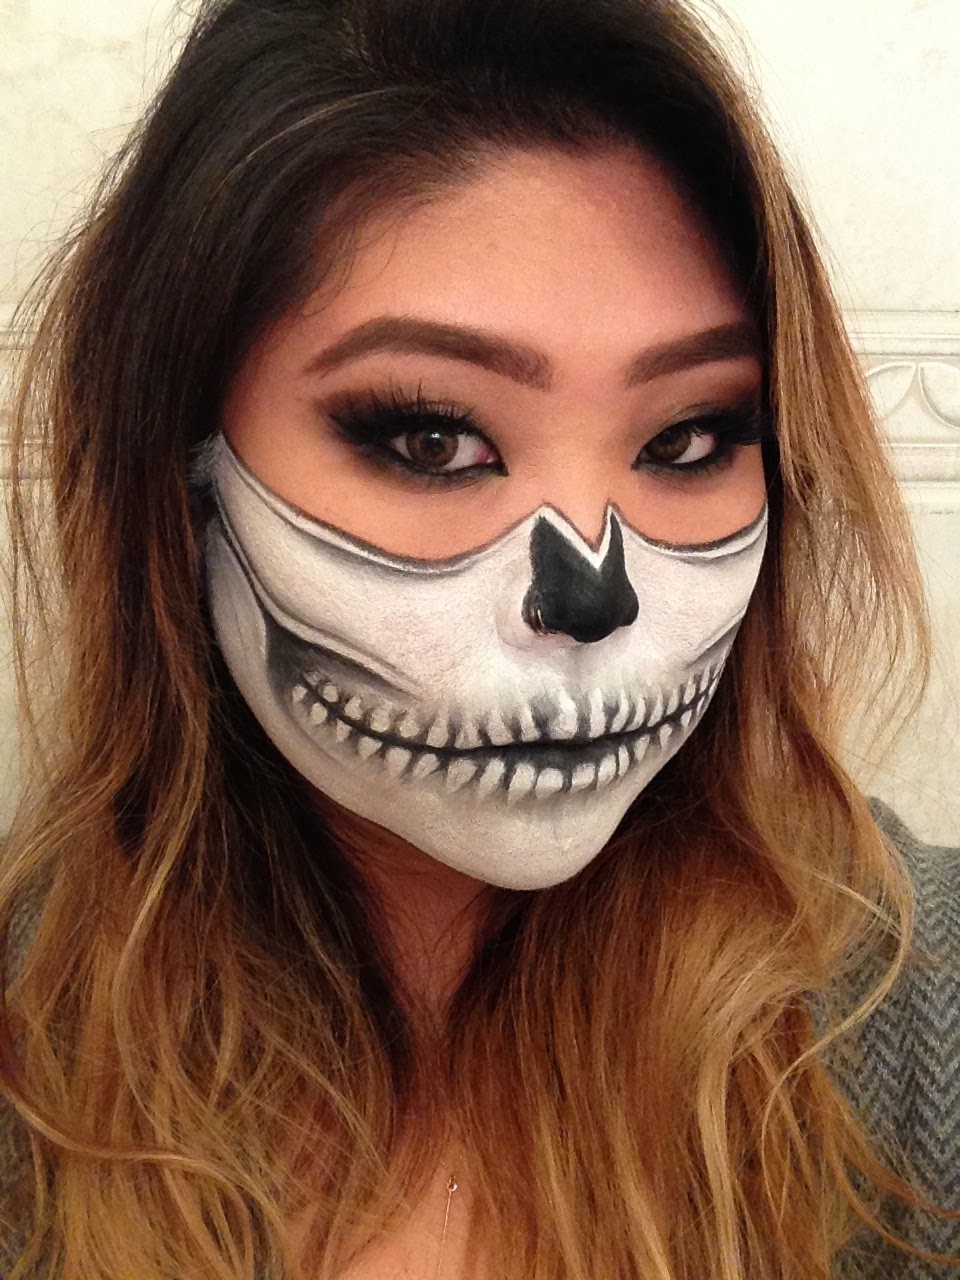
The durability and length-of-wear of these shadows is also super impressive!  I did a complete eye look with a few of the shades in the palettes, and it lasted from application (around 11:30AM) until I went to bed (around 2:00AM).  It barely moved, and didn't smudge whatsoever.  Here's the look after almost 15 hours of continuous wear:


Pretty impressive stuff coming from an $8 eyeshadow palette, if you ask me.  Don't mind the greasiness of my face and lids -- I purposely didn't blot, powder, or touch up whatsoever throughout the day, so I could get an accurate read of the wearability of these shadows!  All in all, this is an amazing value, and such a smart buy.  If you want to invest in an Urban Decay Naked Palette but don't want to shell out the whopping $54 (plus shipping if you buy it online), give the W7 palettes a try.  I promise you they're worth the (extremely small amount of) money!


---------------------------------------------

Thursday, December 4, 2014

DIY: At-Home Cures for Dry, Winter Lips!!

You know when it's coming.  You can feel it in the chilly, dry air.  Winter has now officially hit us, even if the calendar says otherwise.  And with winter comes those dreaded chapped, dry, painful lips.  Places like Sephora and Ulta sell high-end, ready to use lip products that help deal with the dryness, but they tend to be insanely pricey.

One of my best friends was telling me the other day how chapped her lips were, and how no pre-made drugstore product was seeming to help.  My first instinct was to tell her to go out and get some expensive treatments.  I'll say it now.  I am guilty of purchasing them.  Some of my most coveted lip items are the Fresh Sugar Lip Polish ($22.50 for 0.6oz) and Bite Beauty Agave Lip Mask ($26 for 0.52oz).  But, I mean.. what?  Why?  Why would fancy chapstick ever be that expensive.  Don't get me wrong -- I absolutely love my lip scrub and mask!  But then I had a great idea.  There are definitely cheap (or free if you already have the ingredients laying around like I do) and natural alternatives you can make at home.. you heard me.

I already featured a super easy DIY salt scrub, and these next two DIYs are very similar.  SO easy, incredibly cheap, and all natural.  And yes.. they actually work!


DIY Sugar Lip Scrub:

What you need:
Brown Sugar
Coconut Oil
Toothbrush (optional)

Directions:
Mix together about 1 teaspoon of brown sugar with a few "drops" of coconut oil, just until the sugar becomes like a paste.  (There should be more parts sugar to oil.)  Since the coconut oil is basically like a solid, only use an amount equivalent to the size of a few drops of liquid oil.  Mash and stir it together until it's all conglomerated, but don't over mix it!  If you over mix, the sugar will start to dissolve and won't be nearly as effective.


Apply the mixture to your lips with your finger.  You can either scrub it in with the tip of your finger, or use a toothbrush for a ton of exfoliation.  Scrub the mix into your lips for as long as you want!  I'd say the minimum amount is 30 seconds, but go ahead and scrub til you can't scrub no more!  And since it's 100% natural and edible, just wipe it away with a warm wet washcloth when you're done, and lick the rest off!  You can also store this scrub in an airtight container in the fridge to use again.

DIY Honey and Yogurt Lip Mask:

What You Need:
Real Honey
Olive Oil
Plain Yogurt

Directions:
Do this part at night!  Mix equal parts honey (be sure it's 100% honey, and not some fake flavored syrup), extra virgin olive oil, and plain unsweetened yogurt together.  Since you can't really reuse this lip mask, use just a small amount of each ingredient -- about 1/8 a teaspoon.  It should be sort of paste-like and not too runny in consistency.


Slather this mask onto your lips and really massage it in for a while.  Then with any extra mixture, apply to your lips and leave it on overnight.  I know it seems difficult to do this, especially if you're a side or stomach sleeper, or tend to bite and lick your lips often.  But really try to leave it on for as long as possible!  And good news is, if you accidentally eat it, it's 100% natural (and doesn't taste too bad, either).

Tada!


These SUPER simple and inexpensive DIY lip treatments will cure your chapped, winter kissers in no time.  If you don't feel like splurging (or hey, even if you do, but you still want to try something fun at home like myself), these are great DIYs to whip up in minutes, and make you feel like a million bucks.

----------------------------------------------------


Sunday, November 23, 2014

Winter Berry-Inspired Smokey Makeup Tutorial!

Sometimes I like to switch things up and create different makeup looks to match whatever mood I'm in.  And this particular day I was feeling very wintery and holiday-esque (which is quite rare for me, let me tell you).  I decided to whip up a look that incorporated a fresh-from-the-cold berry-colored stained lip and some pretty rosy cheeks.  This is what I came up with!

I liked the look of a super-smokey yet soft eye, so I nixed any harsh lines or eyeliner.  And stay tuned for a fun and easy trick to creating the perfect stained lip and cheek!


I apologize for the absolutely terrible quality of the photos in this tutorial.  I did it at night without any natural sunlight and my bedroom lighting was just NOT working in my favor that night.  

Let's get started! (Tutorial after the jump!)

Tuesday, November 4, 2014

HALLOWEEN 2014 LOOKS!!

For someone who loves the art of makeup (it is called being a makeup artist for a reason!), Halloween  season is one of the best times of the year.  Just look on every beauty guru's blog and YouTube channel -- they're chock full of Halloween makeup tutorials!

This year I created 4 looks on myself, and played around with some fun "zombie"-esque makeup on two of my best friends!  Here's a quick recap of the looks:

Skull mask
Dead girl
Zombie victim
Pop art/comic book woman
Zombie 1
Zombie 2

I had a ton of fun this Halloween with these looks!  I just wanted to share some pictures before it got too late.  I wish I had time to do some photo tutorials of these looks, but school has been super busy and time got the best of me :(

[P.S. I'm always available to do a personal step-by-step tutorial for anyone who is interested in learning how to do any of these faces!  I'm also super willing to do any makeup in-person for a special occasion, costume, Halloween, etc. -- just message me and we can work something out!]

xojaybee

Friday, October 24, 2014

My Go-To Fall Makeup Look! (All Matte Everything)

When I go virtually anywhere in the fall, the makeup look I always turn to is this simple matte makeup.  It pairs a super neutral eye with a barely-there bronze and blush.  If I'm feeling bold I'll wear a dark and vampy lip.  But if I want to be more subtle, I'll just throw on a nude-y mauve and be good to go.


It works with any outfit, for any occasion, and doesn't have any shimmer or glitter or anything crazy. It's also SO simple to create, uses minimal products and tools, and works on ANYone -- trust me!

Tutorial after the jump!