
I wear this "cut crease" look quite often as an every day look. I think it shows off a (faked) cut crease while still being subtle enough for daytime!
A small tutorial on this look is after the jump!
Additional products used:


[+ Sephora makeup brushes]
Tutorial:
STEP 1:

Start with a clean, primed eyelid.
STEP 2:

Using a large, fluffy eyeshadow brush, sweep a light taupe eyeshadow all over the lid, just until the crease. [I used Urban Decay's shade "Naked 2" here.] Only use a small amount of product -- the key is to blend, blend, blend using a windshield wiper motion with the fluffy brush. I'm serious about the SMALL amount of product.. a little can go a long way! Plus, it's easy to add more color, but extremely difficult to take it away once it's already on.
STEP 3:

This can also be somewhat tricky when done the first few times. Using a darker taupe-y brown shadow [I used Urban Decay's "Faint"], take a smaller eyeshadow brush (or a domed crease brush) and create a V-shape with the shadow in the outer corner of your eye. Using the same color, extend the top part of the V-shape up into your crease.
It's pretty easy to find your crease if you have a creased eyelid. Here's a good example of what I'm talking about from another beauty blogger:


This may seem like a "duh" moment, but this seemingly small difference in eye shape can make a huge difference for makeup. I have larger eyes and a slightly more prominent crease in my lid than the monolid picture above, but you get the idea. [Asian monolid eyes come in a huuge variety of sizes, FYI!]
Anyway -- if you have a visible crease, sweep a small amount of the darker shadow in there, almost up to the inner corner of your eye. In my case, to find your "crease," feel around with the end of an eyeshadow brush (or your finger if you are careful not to mess up your already existing makeup) to feel the indent where your eye bone ends. That little indentation is where you'll fake your "crease" for cut crease looks.

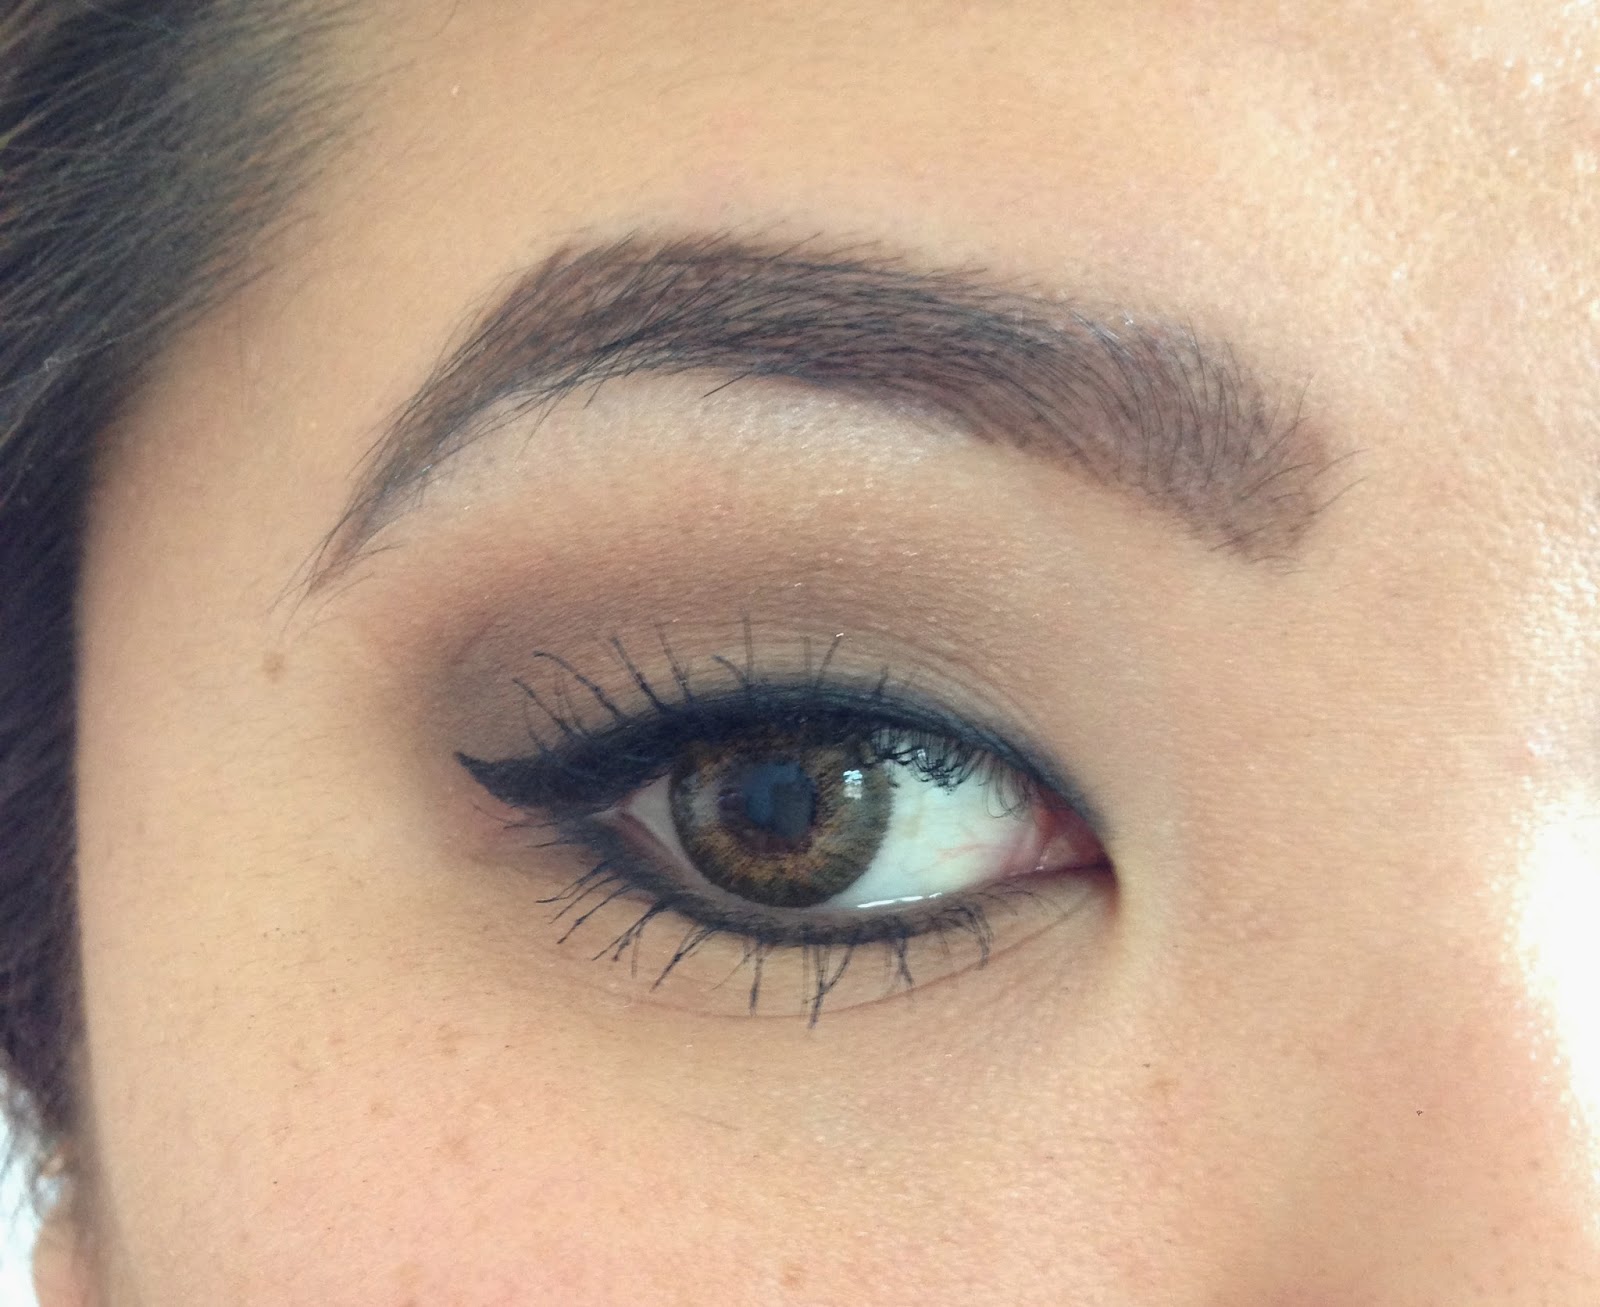
TADA my eyeliner is done! [Go check out my winged eyeliner tutorial for a step-by-step on this.]

This is what the makeup looks like with an open eye! You can kind of see where I "faked" that cut crease.
STEP 5:

Curl your eyelashes! Pretty simple step.
STEP 6:

Build up a few layers of mascara on your top lashes. [I used Diorshow Jet Black.] I have suuuuper long but very spidery lashes, so they can look a little stringy (ew) at times. Wearing false eyelashes tends to solve this problem, but LET'S BE HONEST here. No one has time to apply falsies every morning before they head out the door. I love my YouTube beauty gurus like crazy (seriously, I have a slight obsession with the channels I follow), but they usually always apply falsies to their makeup looks. I think this can be pretty unrealistic, so I try to create makeup looks that look good without having to use falsies!
STEP 7:

Draw a very thin line of any eyeliner on your bottom lashline. It doesn't need to be perfect, because it'll be smudged out later! I try to stay away from applying any harsh liners near the inner corner of my eye, as that can tend to make eyes look smaller and closer together.
STEP 8:

Using that same dark taupe eyeshadow, smudge the bottom liner with a smudging brush. The key here is to really smudge out that liner/color so it sort of looks like your bottom lash line is thick and full. Don't forget this is technically a "day time" look, so steer clear of any dramatic shadows.
STEP 9:

[I don't know why my camera went all red on me here -- forgive me!] Apply mascara on your bottom lashes. I only use one or two coats, which seems to do the trick. Again -- like my top lashes, my bottom lashes are very long but very thin, so they get a little spidery looking!
STEP 10:

Add a little bit of a cream colored, shimmery shadow right below your eyebrow for a subtle highlight! [I used Urban Decay's "Venus" here.] This is an optional step, but I think it really opens up your eye and completes the look!
And that's it! 10 easy steps for a very wearable, matte, cut crease look :]
xojaybee
No comments:
Post a Comment