
BUT!
When I do need to go all-out, this is my full contouring and highlighting routine. I'm warning you all now, this is complicated! But once you get the hang of it, it becomes second nature. [AND, I also have a much less complicated version of this when you still want some good contouring, but don't have the time to go through all these steps. I will post that soon!]
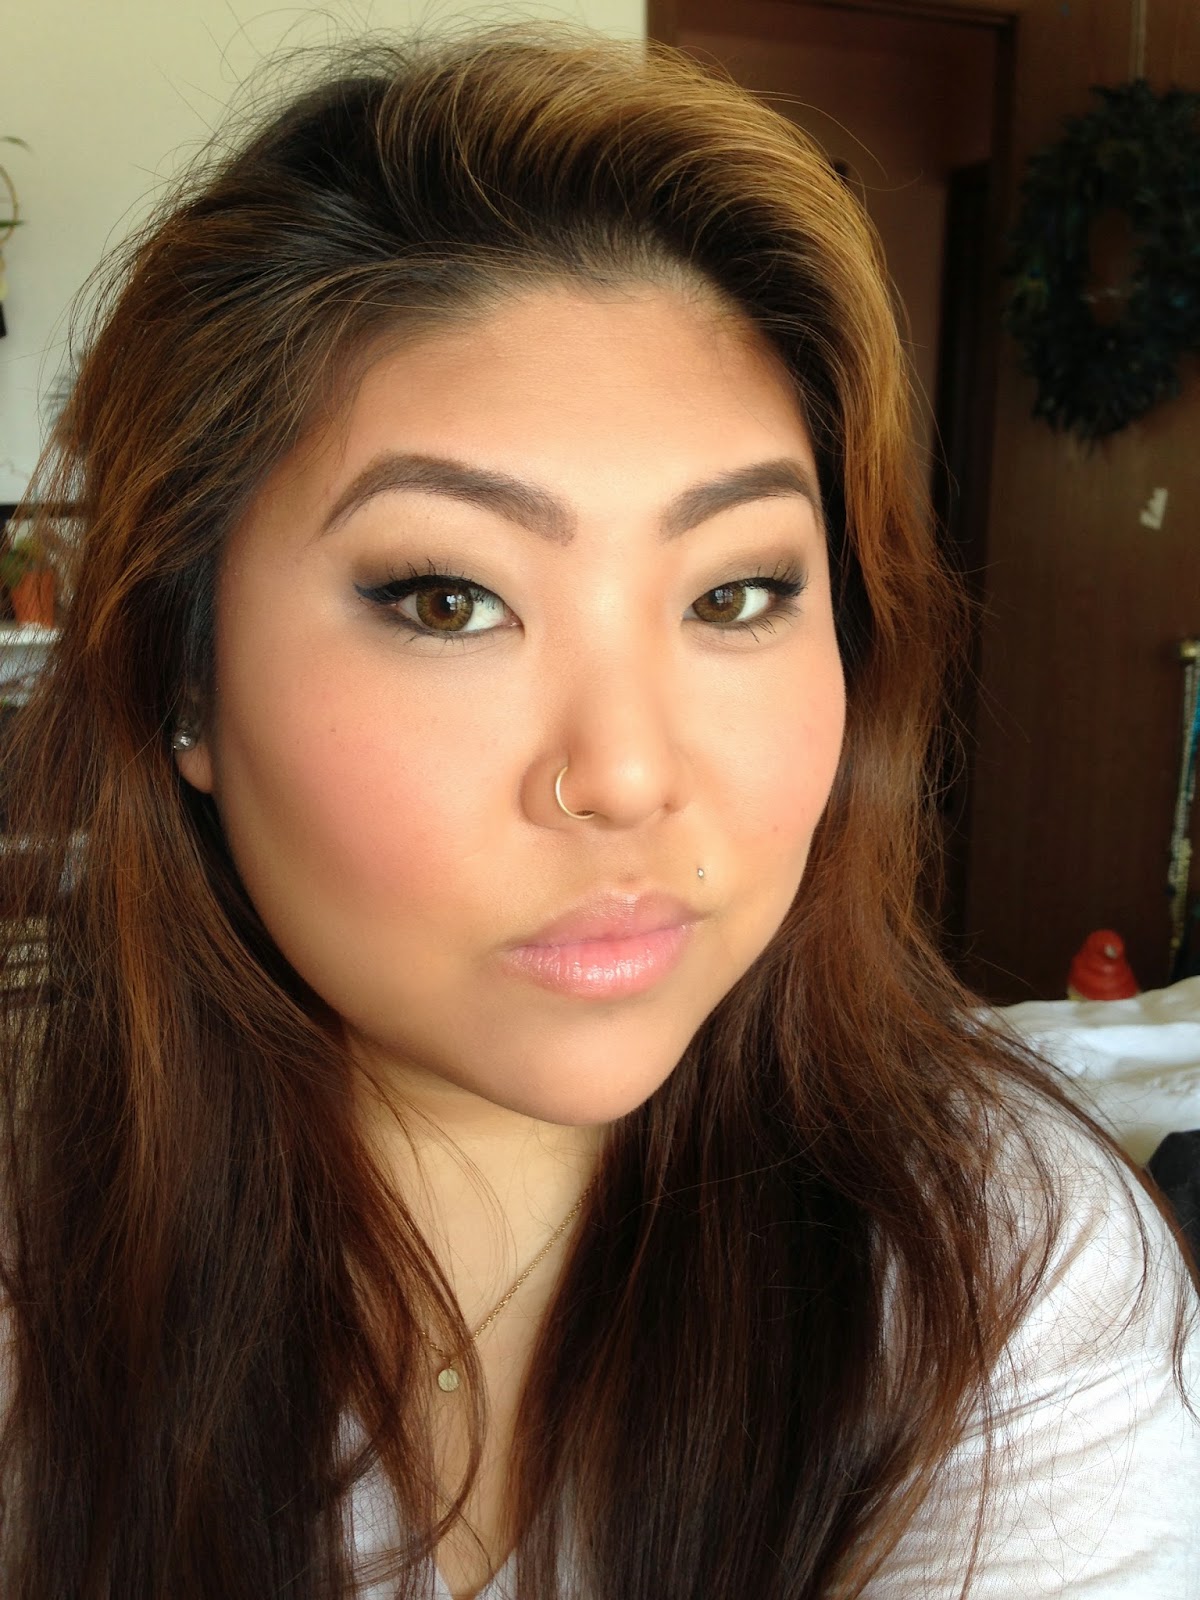
 |
| Your skin can look this good in natural sunlight! |
Tutorial after the jump!!
Products Used:


Benefit Cosmetics Watt's Up! Highlighter ($30)
NARS Blush in "Orgasm" ($30)
Estee Lauder Lucidity Translucent Loose Powder ($33)
M.E. Fluffy Blush Brush ($??)
Sigma Beauty F80 Flat Kabuki Brush ($21)
Maybelline NY Coverstick Concealer in "White" ($6)
Make Up For Ever Mat Bronze Bronzing Powder in "40" ($32)
Sigma Beauty E38 Diffused Crease Brush ($14)
Sephora Collection Pro Angled Contour Brush #75 ($30)
Bobbi Brown SPF 15 Tinted Moisturizer in "Medium to Dark" ($44)
How To:
1. Start off with a fresh face! Then apply your usual eye/eyebrow makeup.
 |
| This is what I look like with ZERO makeup :] |

2. Apply a foundation or a tinted moisturizer.
 |
| Don't mind my cray cray hair today! |
 |
| Skin should be dewey and not opaque! |
3. Using a matte bronzer on an angled contour brush, sweep a pretty "thick" line of color along the BOTTOM of your cheek bone. Do not put any color on your actual cheekbone, or you will really throw off the proportions of your face. Try to get all the color concentrated in the hollows of your cheeks. Start at the point where the top of your ear meets your face (usually where your "sideburns" are), and follow the angle of your cheekbone, towards the tip of your mouth. Sweep the color in a slight upward curve when you get to the end of your cheeks. [Try to use a color that is 3 shades darker than your foundation color.]


4. Sweep the color up towards your temple, hugging your hairline. This color doesn't need to be as dense, but make sure it's actually visible.


5. Starting at the point where your ear hits your face, sweep the bronzer along your jawline down to your chin.


6. I obviously figure you all know to do the same steps to both sides of your face!!

7. Using a small, denser brush (honestly, any brush will do), sweep a small amount of bronzer on the sides of your nose. Start where your eyebrow meets the bridge of your nose, and go down all the way to the tip of your nose.


8. Done with the contouring! On to the highlighting. Highlighting is supposed to, well, highlight areas of your face where light, if coming from above, would naturally illuminate you. Keep this in mind as you highlight!
Using either a creme highlighter or a concealer (try to do 3 shades lighter than your foundation color), make a little triangle of highlighter underneath your eye. Don't go so far down that you get color on your cheekbones, though!

9. Draw a thin line of highlighter down the center of your nose! Pretty simple.


10. Draw a few thin lines of highlighter on your chin.

11. Do the same thing on your forehead, concentrating the highlight in the center of your face.

12. Add a thin line right below the bronzer on the hollows of your cheeks.

13. BLENDING time. This is probably the most crucial part of contouring, because you don't want to leave any harsh lines on your face.
Using the same brush as you applied your foundation, buff the bronzer and highlighter on your cheekbones in small, circular motions. Start at the top and work your way down, making sure you aren't leaving any darker areas of color.

 |
| It should look like this! |
14. Buff the bronzer out that's on your jawline, using the same circular motions. Start at your ear and work your way down to your chin.


15. Do the same thing to the other side! Make sure both sides of your face are even!!


16. Now time to buff out the highlight under your eyes. Use very small, circular buffing motions with the brush.


17. Buff out the highlight on your chin, using the same circular motions.


18. Buff out the nose highlight and contour. This step is a little tricker, because the area is a bit smaller and more delicate than the rest. You can use a smaller foundation brush, or even a flatter concealer brush, to blend this out. And make sure not to actually blend the bronzer and highlighter together, or else you'll lose the contouring effect!


19. Last step of buffing! Carefully blend out the highlight on your forehead. If you've filled in your brows, be sure to avoid buffing any color into your brow area!

 |
| With everything blended, it should look like this! |
20. Using an illuminating highlighter (I honestly recommend Watt's Up! to do this step -- it's amazing) draw a line of product right on top of your cheeks, right where the sun would hit. Using your finger, just blend this shimmery stuff right into your skin!


21. Set your face, gurl. Using any type of loose translucent setting powder and a large fluffy face brush (make sure it's translucent though! -- you don't want to cover up any of the hard work you've just done with an opaque powder), set your face all over!


22. Apply a peachy-pink blush to the apples of your cheeks with a fluffy blush brush. Start at the roundest point and work your way up to your hairline. Follow the same line as your bronzer and sweep the color right above the contour for a seamless look.


23. Pop on some lipgloss if you want, and you're all set!!!

I hope this all helps you achieve the perfect face! These photos legitimately have zero editing or filtering -- just the contour/highlight and the natural sunlight! If you follow these steps, you can have just as flawless of a look.. promise!
Like I said earlier, I know this is a lot of steps. So I'll be posting a toned-down version shortly! Same type of look using only bronzer and a little highlight.
Stay tuned!
xojaybee
No comments:
Post a Comment