
The shirt I used in this tutorial is bright red.. aka a color that I don't usually wear in t's.. so I'm still deciding whether or not I want to bleach it (or even bleach splatter it). But for now, it is what it is!
This DIY seems like a lot of "steps," but I promise you it is NOT complicated at all!

If you want to know the EASY PEASY steps to make this backless t-shirt, a DIY tutorial is after the jump!!
Materials You Need:
Cotton t-shirt of choice (preferably a little oversized.. but NOT too much!)
Pair of hefty scissors
White chalk
How-To:
1. Use a shirt that is maybe only one size larger than the size that would fit you like a glove. So if a Medium t-shirt lays flat against your body, use a Large. Don't use any huge shirts, because you'll be stretching it out later and it will end up being wayyy too big! I also recommend using a 100% cotton t-shirt, because a lot of polyester shirts or other types of synthetic fabrics don't cut and stretch as well.. and then the final product won't be so great.
Lay your shirt flat on a surface (preferably a hard surface.. but I did it on my bed just for the sake of the photos). Grab your scissors, and let's get started.


2. Turn your shirt inside out! Lay it down with the "front" of the shirt on top.

3. With white chalk, trace a dotted line like this on the top by the neckline. [If your shirt is white or a really light color, use any sort of darker colored chalk!] I like using chalk because if you make the lines and want to change them, all you have to do is wipe it away with your fingers and start again (as opposed to using something like a sharpie or a pen).

4. Make chalk lines to outline the future arm-holes of the tank. I've done so many DIY shirts so this step is super easy for me, but it can be a little tricky for the first few times. If you need to, take an oversized tank top that you know fits you well and lay it over the shirt as a stencil. Then you can trace those arm holes with the chalk to make the perfect lines!

5. Cut the arms! Cut through BOTH layers of fabric, and cut the arm portion all the way off!


6. Following the other lines, cut the other arm hole off.

7. For some reason I forgot to take a photo of this but flip the shirt over! Flip it so the back of the shirt is facing up. Fold over just the very top of the shirt by the shoulder to see where you drew the chalk lines by the neckline on the front -- continue that same line onto the back of the shirt.

8. Draw a looong chalk line down the back of the shirt. Once you get the straight line past where you cut the armholes, start curving the line to make it horizontal.

9. Do the same thing on the top of the shirt on the opposite side, and draw the chalk line down the back of the shirt exactly like you just did on the first side. Connect the two lines down at the bottom, below the arm holes, to create a U-shape.

10. Cut! Cut down the entire U-shape line you just drew, but ONLY through ONE layer of the shirt! It's easy to start cutting if you nip the top shoulder seam first to get the cut started, then continue down the line. But really be careful to make sure you are only cutting through the back layer of fabric or else you'll ruin this DIY half-way through!


 |
| ONE. LAYER. ONLY! |
11. The shirt shirt should look like this first picture when you flip up the "flap" of fabric that you just created. Once you've cut out the entire U-shape, flip over the shirt so that the front is facing up again. You should see the original chalk neckline you drew earlier.


12. Cut along the chalk line that is left around the neck. There should only be one layer of fabric to cut through, since you just cut the back and flipped that flap up. Cut the fabric until the entire neck portion of the shirt is detached from the rest of the shirt.


13. It should sort of look like a regular tank top at this point (especially because the low, non-existent back is facing down). Take the shirt and stretch it out with your hands -- stretch any new "seam" that you just cut. The shirt gets a lot bigger when you do this, so don't worry about how much it looks like it's stretching out.


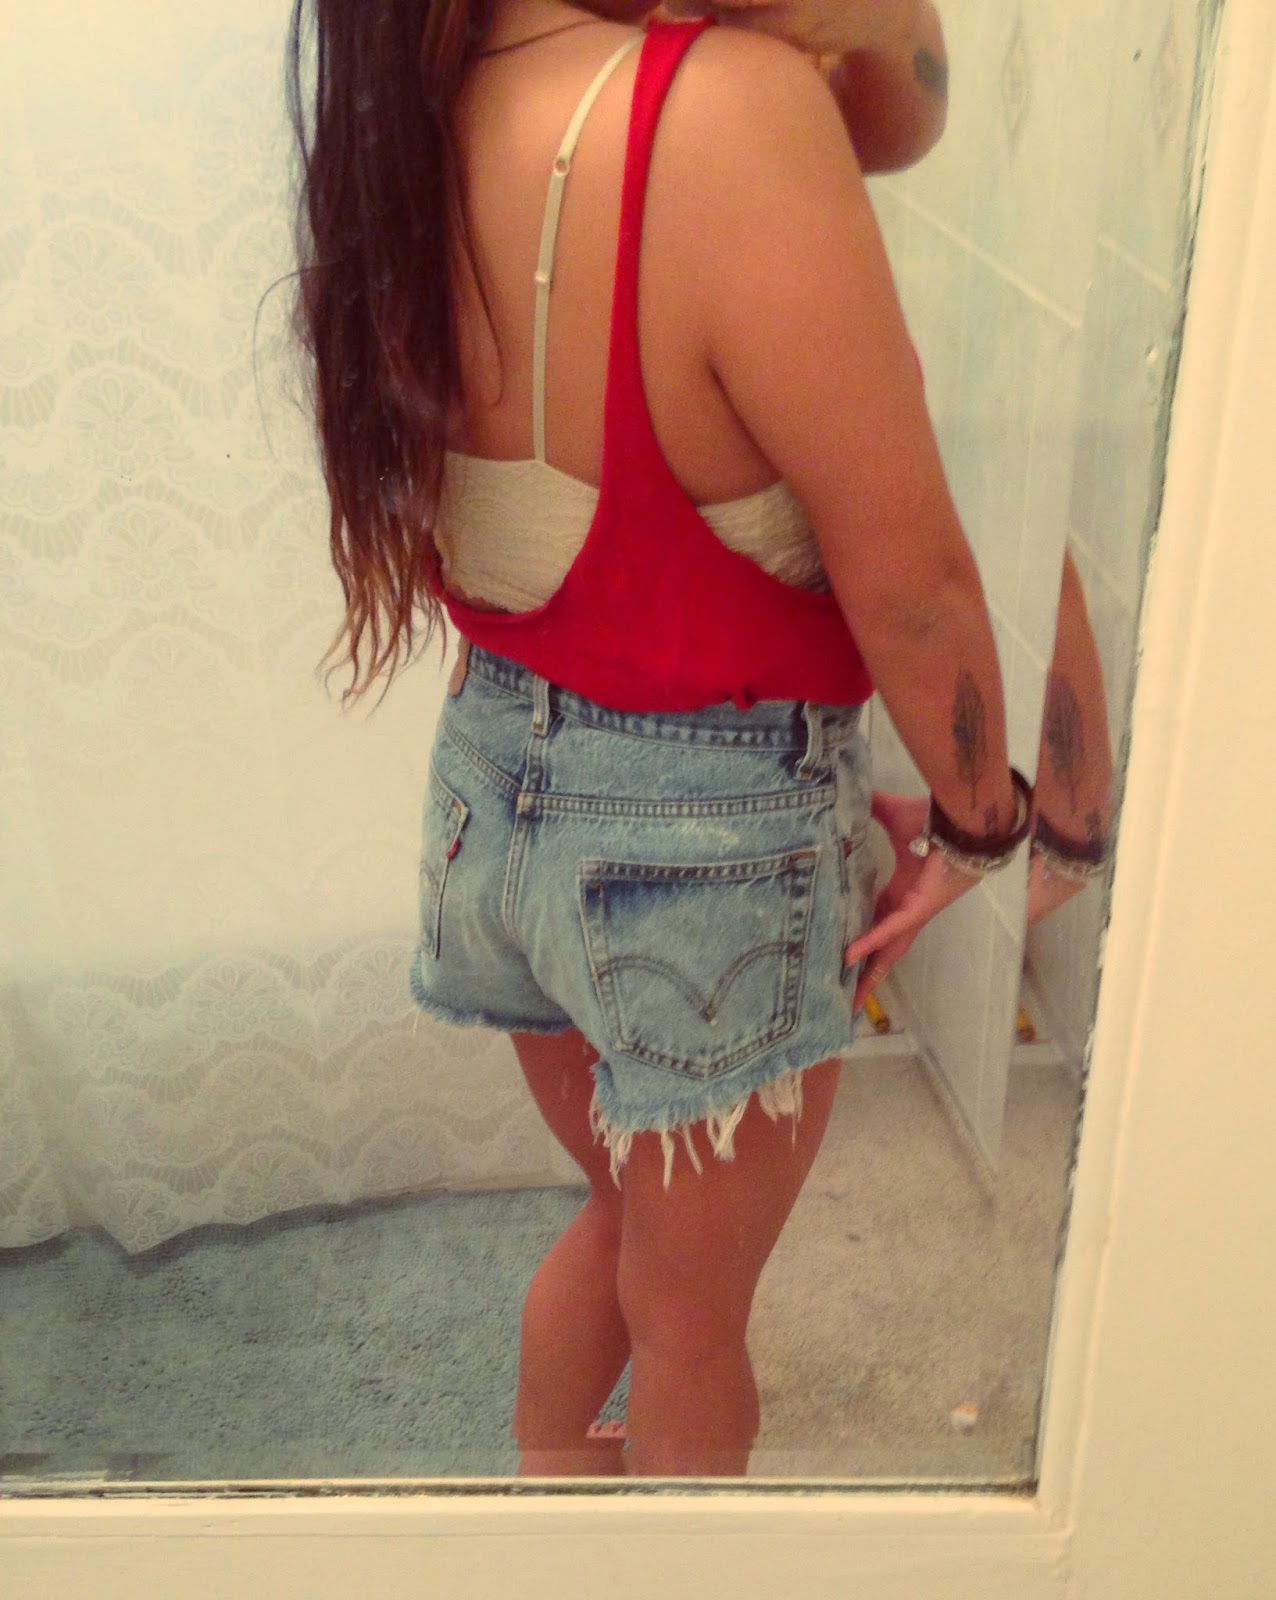
14. Turn your inside-out t-shirt back to normal, and voila! You have yourself an amazing, backless DIY t-shirt!


You can wear any sort of bra, bralette, crop top, tank top, cami, you-name-it, underneath this t-shirt! Different layers will create entirely different looks! I just layered mine on top of a nude-colored lace bralette from Urban Outfitters (Pins and Needles Lace Lonline Bra - $24), but because I have about 30 cropped tops and bralettes (not even exaggerating..) I could pair it with anything and change the look completely.
I have a lot of fun with DIY t-shirts because every single one comes out totally unique and one-of-a-kind. I'll put more of these up soon when I get my hands on more t-shirts! (I always get them from thrift stores for about $2-$3 each!)
xojaybee
No comments:
Post a Comment