
First off -- I know I've been gone for about a month! I've been so busy with the school year starting back up, and was trying to get so much shit done during the end of summer break before my soul was sucked from my body. Then having to readjust to a new semester really kicked my ass. But here I am, and I'm back!
I have so many blog posts lined up to write (tutorials, product reviews, hauls), but I figured I'd start off slow. So let's get into it!
I recently purchased some nail striping tape. If you've ever seen nail designs that you loved with super-clean-looking stripes, patterns, or designs, I bet they were done using nail striping tape. It looks really impressive, and seems pretty complicated and out of realm for most at-home nail painters. But that's far from true! Granted, yes, it does take a smidgen of practice and skill -- but I'm telling you, it's so much easier than it looks.
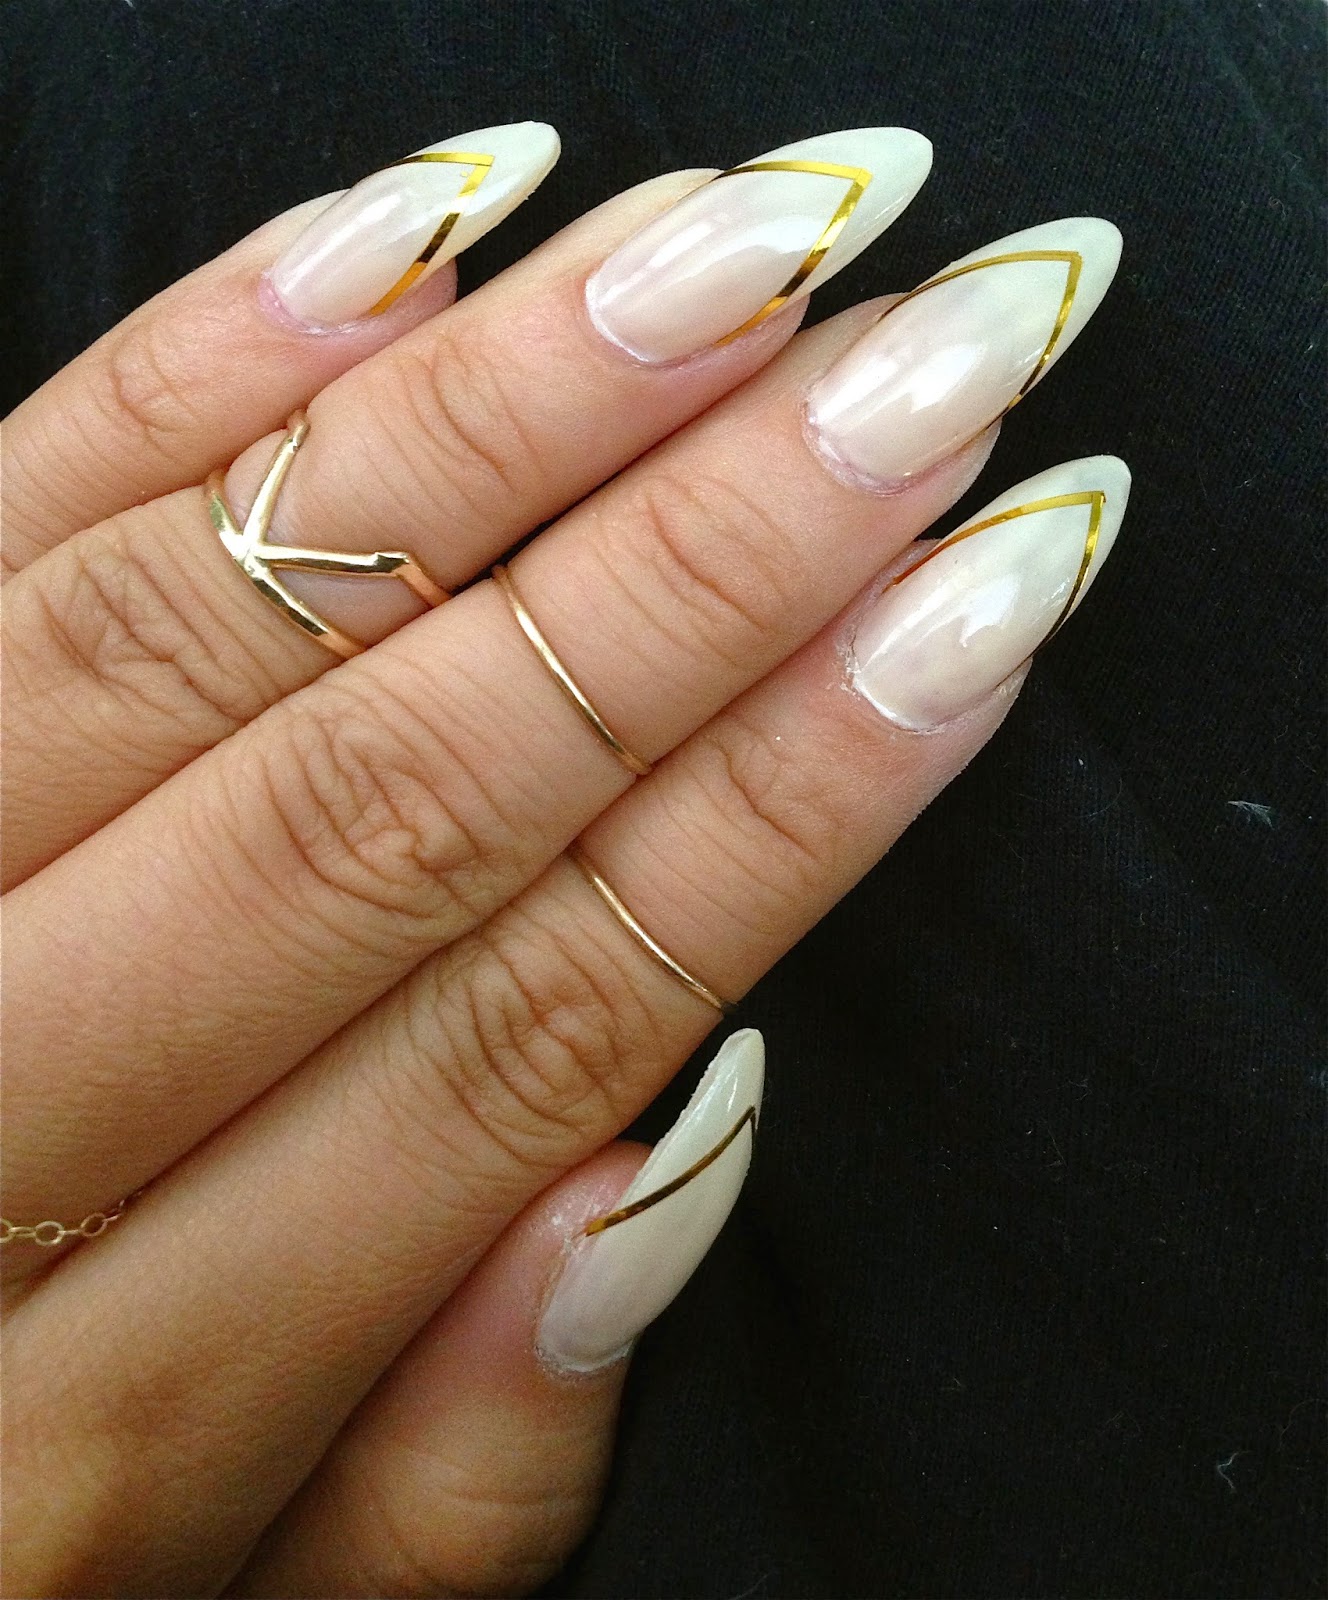
I decided to do a really clean and simple design. I started with two coats of a semi-sheer nude/cream nail polish for the base. (Hold off on the top coat though until after the tape is on the nails.) Wait til the nails are 90% dry before applying the designs! Then I cut two strips of a gold striping tape and placed them in an inverted-V shape to mimic the shape of my stiletto/almond tips. I started with the point of the "V" in the middle of my nail and laid it down on an angle, with the rest of the strip hanging off near the edges of my nail (where my finger meets my nail). Once the tape was on the way I wanted, I cut the excess ends off the ends, and firmly pressed it down. I finished off the design with a thick coat of clear no-chip polish -- this makes the nail look shiny and binds the tape to the nail so the ends don't stick up and peel off!
Whew! That seems like a lot but it's sooooo simple. You can do any design that you can think of!

The nail striping tape comes in thin spools like this. The tape itself is tacky on the back, so it makes it easy to place a design. They're not too sticky though, so you can peel it off if you aren't happy with the way it turned out, and re-stick it over and over until you like the final product. Keep in mind though that they aren't going to stay on your nails unless you paint over the design with a thick layer of top coat!
The colors above are gold, bronze, black, and white -- staple neutrals! I get mine from the Etsy shop Pixel Piece, based out of California. I try to buy domestic products when possible, because it's cheaper shipping, faster turn-around, and overall a nice idea to buy from US-based sellers. Pixel Piece sells about 60 different colors of nail striping tape, for only $0.99 a color!!

Obviously the tape is super thin and perfect for creating any sort of design you want on your nails. You can also use this tape for virtually any craft-y project you can think of -- decorating notebooks, room decor knick knacks, custom artwork.. you name it.
It looks fancy and impressive, yet takes only a few minutes to create. How can you go wrong?
xojaybee
No comments:
Post a Comment